How to Start a Stunning, Simple Travel Blog

Please share

Table of Contents

If you ever wanted to build a  travel blog, a website or even a E-commerce site now is the best time to do it.  

With over 1 billion blogs online, there have been some huge advancements in the software that is used to build them. 

This is great news for you because if you are interested in building a travel blog you can do it quite simply and affordably. 

Today I will teach you the best ways I have found over the years to build a website, which not only will look amazing but also grow with you as your needs may change. 

First Steps

Passion travel blog

Now that there are over 1 billion blogs on the internet it might seem difficult to stand out among the competition.

It might seem like a daunting task ahead but the truth is with every blog that gets added online there is a new possibility for someone to break through and become another star.

In fact you could be that next big thing, the reason being is that you bring something unique to the table. And that is your personality and your expertise.

After all you came to this blog to learn more about creating a travel blog even though you probably went through a couple to get here. Each blog might have similar information, but each blog has a different way of sharing that information.

And sooner or later you might find someone that really helps you achieve exactly what you want to achieve. 

This could be exactly the same for your situation. So don’t think of the difficulties but focus on the possibilities.

My biggest suggestion though, prior to sitting down and creating a blog is to figure out your vision/passion and which direction you want to go with this blog.

If your vision is to make money then you probably will find out that you burn out quite quickly and just give up. 

Realistically speaking you probably won’t see any money coming to you within the first 6 months and even then it’s not going to be huge.

So you need to create a blog about something that you are passionate about (for example travelling, cooking, adventures) 

This is because by focusing on something you are passionate about you will have no problem learning more about it and sharing it with people on a regular basis. 

Sharing it by writing amazing passionate articles, mingling with people who share the same interests as you and so on.

So before you even begin to build a blog sit down and figure out your why. Why exactly you want to build a blog.

  • That being to help people learn about your trips.
  • Sharing stories, pictures, ideas.
  • Sharing your knowledge on a topic you know a lot about
  • Teaching others about specific skills
  • Selling your Ebooks, products or courses.

Whatever it is, take the time on this step to figure out what will motivate you the most to work on this project in your spare time.

After all you will be talking about this topic for quite some time. But with consistency you will be able to create a blog that people from all around the world will be reading about.

Use the form below to help you brainstorm some ideas. We are not collecting your details, this form will be only sent to your email address. If you would like to sign up to our newsletter then please sign up in the sidebar.

Brainstorming Form

Picking a Domain Name

Wnomad Travel Blog Domain Registration
Now that you have figured out what you are passionate about, it is time to start thinking about finding yourself a domain for your website. Basically the address that people will search for when looking for your website. There are a few things you should consider before buying the domain name for your website and I will happily share with you some ways to make sure you can find an easy to remember website name that will entice people to follow you and your stories.

Set a time limit for about 5-10 minutes so that you don’t end up procrastinating too long. After all you want to start sharing your information as soon as possible.

Just start writing whatever comes into your head and afterwards you can sift through the ones you like the most.

Simply put you want a domain name that will be easy to type and something that people can remember easily. 

If you start making the using jargon or made up words, you might find that people will get confused and steer away from your domain name.

Additionally, try keeping your domain name short. After all each additional letter gives more chances for people to get your domain name wrong.

Try steering away from numbers or special characters as people in most cases don’t use those when typing in domain names.


Don’t make it to specific unless you are planning to exclusively write about that one thing.

E.g. if you are creating a travel blog and you create a name: mikesamericagetaway.com then it will be strange to write about other travel adventures you might have in the future outside of America.

Additionally you are creating a blog for years to come so don’t put a date on your website

  • If you are considering building a travel blog for yourself then use your name or an online alias that you like the most.

    After all with the travel blog you will be selling yourself. People will be coming back for you.

    You are after all your biggest selling point.

  • Get a domain name with a .com as its the most widely used. It helps with search engine ranking and simply put people are more likely to type in .com then any other domain ending. 
  • Use keywords specific to the topic you are blogging about.

    For example:
    -Traveling
    -Adventure
    -Kayaking

    You know best what you will be writing about. For some travel blog domain name suggestions you can also check out this domain name generators.

    https://instantdomainsearch.com/domain/generator/

    Find at least 5 that you might be interested in using and write them down

Now that you have found 5 Domain names lets check out the social networks to make sure you can save them for yourself.

Social Networks that you should focus on most are:
-Facebook
-Instagram
-Twitter
-Youtube
-Pinterest
-Reddit

If you find that your name is taken up then consider using a different domain name. After all you want to keep everything as brand specific as possible.

You don’t want people typing in a different name between each and every social network they come across.

Also as an added note. You do not have to be on every single social platform, but by reserving the names at the start it makes it easy for you to work on that social network later down the track if you decide to spread your reach.

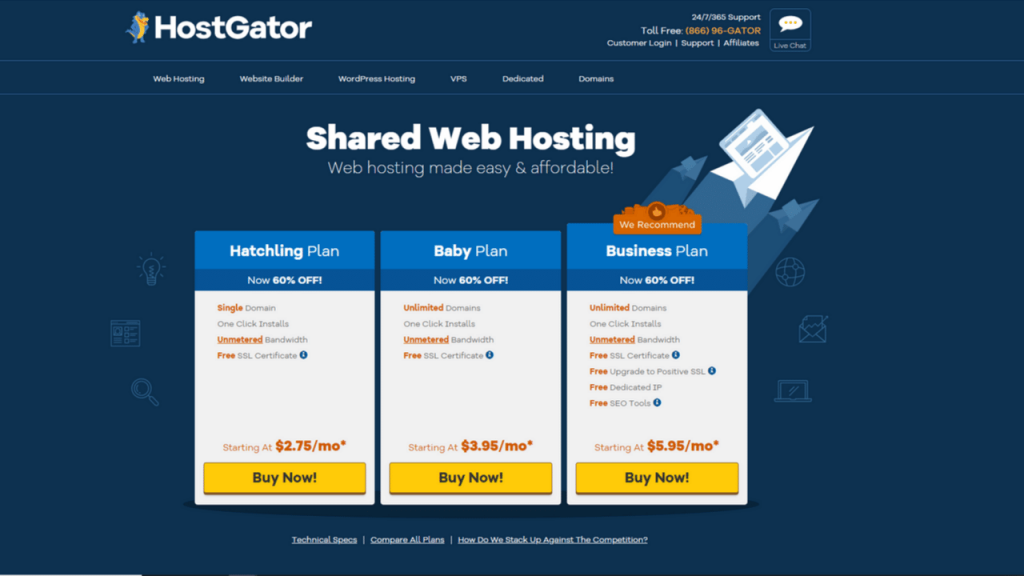
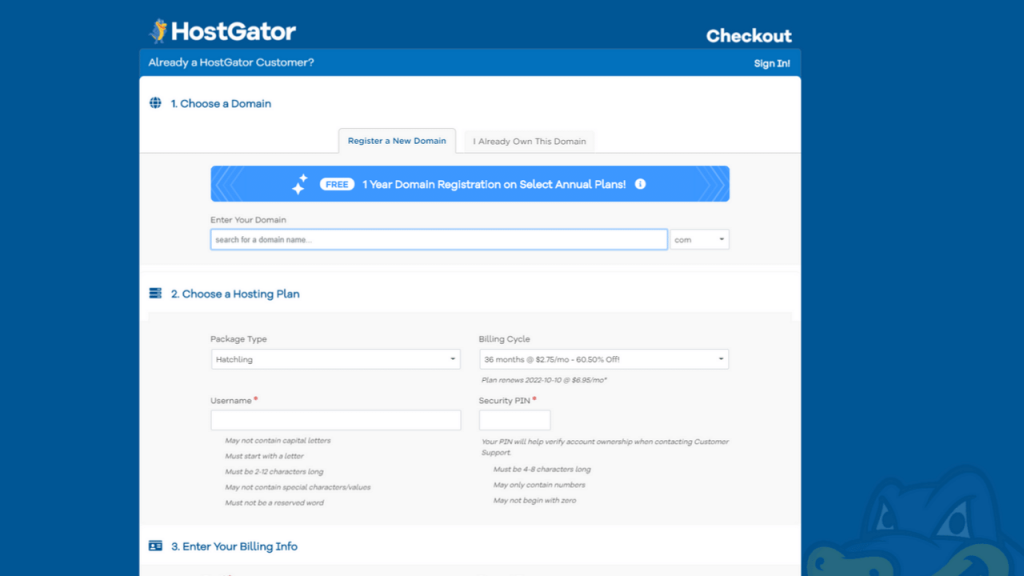
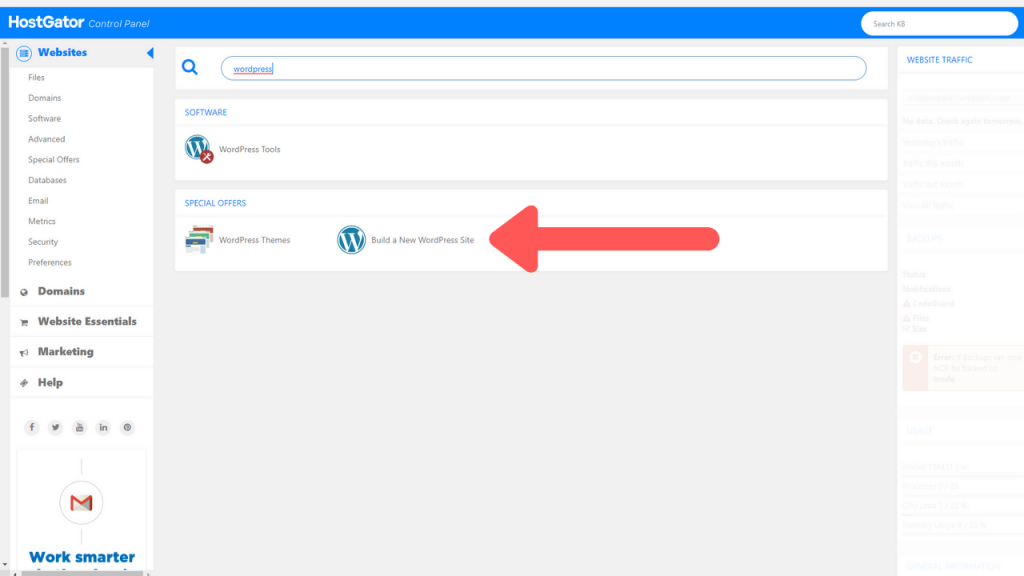
You can purchase a domain name when registering for hosting which makes it super simple to set everything up.

Taking out a step in the process as everything is already in one place.

But if you decide to purchase a domain name on it’s own then I would recommend using  Namecheap. 

It’s a company I have used for many years and besides their competitive prices I find them to be quite simple to work with.

Check out the link below for more information.

Get your own address on the web with Namecheap. Register your domain now at prices starting at $3.98/year

You have found the perfect domain name for your website.

Now all that is left, if you haven’t done so already is to reserve your name on the social networks. 

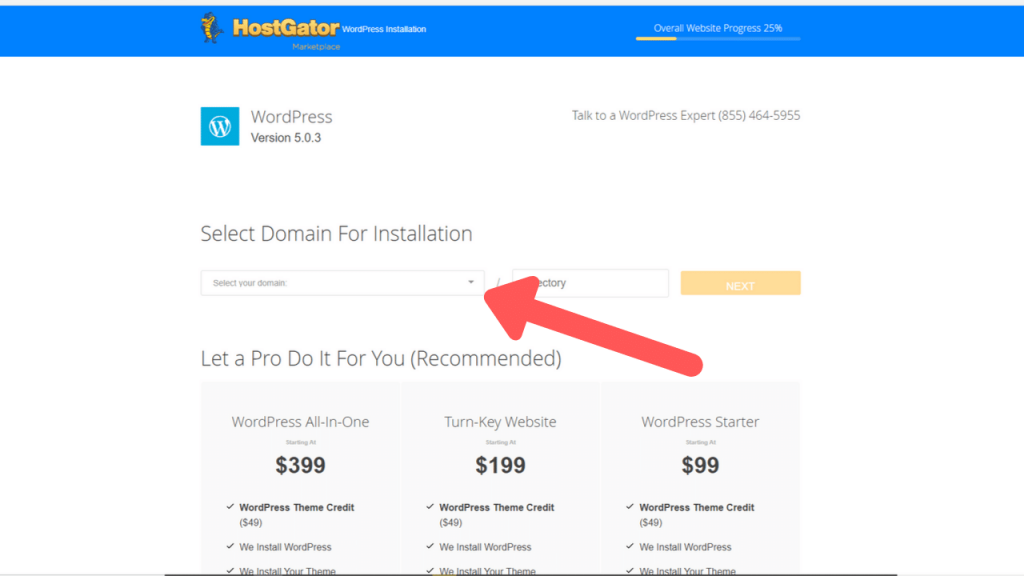
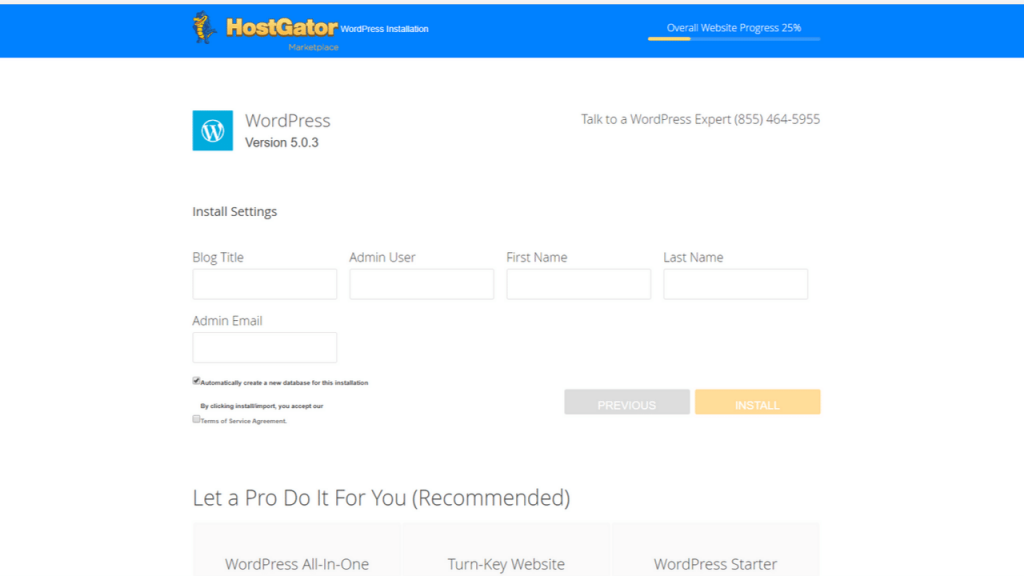
In the following chapters  (signing up for your hosting) you can purchase your domain name with your hosting package.

Create a Logo

Now that you have purchased a domain name and reserved yourself the social networks it is time to get a bit creative.

After all your logo is going to be the first visual thing that everyone see’s and it will be represented on all your social networks.

You will want to create something simple that your audience will like. Some examples of logo’s that everyone knows about.

-Coca cola
-Mcdonalds
-Apple computers
-Microsoft

You can hire someone to create your logo on fiverr which is affordable, professional and fast.

Or create it yourself using a website  like

https://logomakr.com/

Something to keep in mind is that you should create something simple, something memorable, and something specific to the topic you have chose to blog about.

Signing up for your Hosting

Now that you have picked your Domain name, reserved the social networks and created a logo, it’s time to get your website online.

For that you will require hosting which is like a block of land to which your domain name (address) points to and directs people or otherwise known as (traffic).

Over the years I have been using many hosting companies but I always return back to using Hostgator due to the fact that they are the biggest hosting company at the moment.

Their prices are quite good and when it comes to customer service it’s 24/7.

Meaning if you get into any trouble you always have someone to chat with.

The most important thing though is that they have many different types of hosting which makes it easy for you to upgrade once your travel blog or blog gets more and more traffic.

So the website can grow with you and your requirements.

How to Purchase your Hosting

First of all go to Hostgator and select 1 of the 3 packages.

For now as you are starting I would recommend selecting the Hatchling Plan as it is the cheapest.

Later down the track you can upgrade your accounts if you require 

Now that you have selected the package right for you, proceed with entering your domain name that you have selected already.

Afterwards enter all the required details so that you can complete your purchase.

If you want you can start off your website with a monthly plan but I recommend going for either a year or 3 years just because of the massive savings you will be able to get for yourself. 

Plus if you pay upfront you put yourself in a situation where you actually will continually work towards getting your blog more visitors and most importantly remove the need to think about future payments. 

Quite simply if you run a website for 3-4 months you pay off 3 years of hosting already.

Next you will be provided with information about a few services. I usually skip these but you can read over them and pick the option that’s best for you.

Finally you will get a run down of all the prices and if there are any coupon codes this is the time to enter them.

Either way check the price again purchasing a 3 year plan costs less than 3 months worth of monthly payments. 

So the savings over the longer period will be huge.

All you need to do is tick the box and select checkout now to get directed to the next page

And that is it, you have just registered for your hosting plus a domain name which means you have reached the part .

This part is the part that gets exciting as you get to create the website the way you want it to look and more importantly start blogging.

Installing WordPress

Once you have registered your domain name and purchased your hosting package you should get an email to log into the a back end of your hosting account.

There you will be able to start putting together your website using a content management system (CMS) known as WordPress.

To quickly explain what WordPress is in the simplest way possible consider it to be like your modern-day smartphone. On its own the smartphone has very basic functionality but still will provide you with the Internet, phone calling, messaging and a calculator.

If you decide to expand on its functions you have the possibility to download specific applications which are tailored to your needs and wants.

WordPress is very similar in the sense that It provides you with the basic framework which you can expand upon using many plug-ins and themes available on the Internet.

By adding these plug-ins and themes you can end up with a very professional looking website that fulfills yours and your followers needs.

I will talk more about plug-ins and themes in a different section on this website to help you decide which ones are best suited for a start-up business.

For now let’s focus on installing WordPress onto your website so that you can begin your blogging journey.

So now that you are in the back end of your websites you will find a search bar at the top of the screen. (Check out the picture below for more information)

In that search bar type in WordPress.

Below you will find a few options with one of them being “Build a new WordPress sites”

Click on that option and get be directed to the next page

Installing WordPress - Travel Blog

Once the page loads you will see a drop-down box in which you can select your domain name.

Once you do that click the next button to get directed to the following page

On this page you will have a few boxes to fill in to help you set up your website.

The first box is the blog title. I usually just type in the domain name without the HTTP and WWW.

For example for this website I just typed in W nomad.

With your name and surname you can write a Internet alias if you prefer to be a bit more private, as for the username create a strong username

What you can use is admin, support, your first name, your nickname, whatever you feel comfortable with.

After all this is going to be the username that people will see when you reply to comments or under the posts to show who the author of the post is.

Finally you will get your log in information sent to the email you type in.

You can always change this later down the trach.

Once you filled in all the boxes, check of the terms and agreement option and click next. WordPress will begin to install under your domain name.

Once WordPress is installed you will end up on a page with your login details.

Copy the password as it is randomly generated and click the Login button to get redirected to your newly installed WordPress website.

When you get redirected you will be asked to input your log in information.

I would recommend to bookmark this page so that in the future it is easy for you to access the website. 

Or just remember to type in /wp-admin at the end of your domain name to access this log in screen from any other device you may use.

Setting Up WordPress

Let’s begin with the basics, as you log in to the back end of the website you will be confronted with a lot of pop-up sections and information which can be quite’s daunting at first.

Have a read of this article to find your way around the WordPress Dashboard.

What we will do now is go around all the notifications, straight to the plugins tab which you might remember as being like applications to extend your WordPress functionality.

Backend of WordPress - Travel Blog

Once you enter the plugin section scroll down the page where you will see a list of plugins.

As far as I’m concerned, all of these are bloatware (unnecessary plugins that slow your website down) which get preinstalled with your website and because of that is I recommend removing them all at this point in time.

By doing this your website will be stripped back to the very basics and give you the opportunity to build a website to your very own like.

To delete all the plugins click the select all checkbox and then click the drop-down box above to select the option “Deactivate”

Next click the apply button. This will switch off all the plugins for now. But this means they still are on your website and slowing it down unnecessarily.

So again you will click the select all check box and in the drop down select “Delete” and then press apply.

This will remove all the plugins leaving you with a simple clean, bloatware free website. 

Installing Plugins

Let’s start installing some of the more important plugins that will help get your website running faster, and more optimised for the search engines.

Please be aware that this is a selection of plugins that I have personally picked after years and years of research and find them to be simple yet powerful when it comes to running your WordPress website.

To install the plugins simply click the “Add New” button at the top of the page and here you will find a large list of plugins you can use.

For now my recommendations are as follows:

Image optimization service by Optimole – Complete handling of your website images.

WP Fastest Cache – The simplest and fastest WP Cache system

Yoast SEO – The first true all-in-one SEO solution for WordPress, including on-page content analysis, XML sitemaps and much more.

Click here to find out what other plugins I recommend and why I install them on each and every single one of my website

Installing a Theme

Adding a WordPress Theme - Travel Blog

Now that your website has all the right plugins let’s begin designing the look and feel of it.

For this you will have to go to the appearance tab where you will find a few themes you can use right away.

As WordPress is one of the biggest’s CMS on the Internet you’ll find that there is a huge amount of themes which you can use.

Both free and premium ones which can cost anything from $10 upwards depending on the theme.

For now you can click the “Add New Theme” and browse the vast amount of themes and get some ideas of what you would like your website to look like. You can install one if something has caught your eye in particular.

Simply click “Install” followed by “Activate” to have the theme set on your website

My recommendation is to use the "Hello Elementor" theme as it is incredibly basic and with the use of the Elementor plugin, you can design your website to the exact specifications that you like. I will explain Elementor in another post.

Now it’s time to check out your website to see how it looks.

Yes it’s true it does look quite basic, but that is fine as you still haven’ added any information yet making it still pretty bland. 

Create your main pages

But that is not a problem because now that everything is set we can start focusing on the fun part of creating content for your website.

Something to take into consideration though is that you should probably fill out a few important pages which will help your readers to learn something about you, have a way to contact you and discover your privacy policies which are a requirement these days on each and every single website.

To create these pages, go again to your left sidebar and click Pages —> Add New. (For blog posts, use Posts –> Add New.)

Here is a list of the most important pages I think you should install right away:

About page – This page is where people get to read a brief description about you and your brand. Here they can quickly get to know you and decide if they are interested in what you have to offer.

Contact page – Besides being able to get in contact with you via the social networks you have set up, it is also important to have a contact us page so that they can email you directly. 

Privacy page – This is a standard user agreement page informing readers what the applicable laws on your site are, that you use cookies, etc. etc. You can find out-of-the-box examples throughout the internet. 

Terms of Service – If you are planning on selling anything, providing a service etc. a terms of service is necessary for your website. 

To download your Privacy Policy and Terms of Service Templates for Free check out this link

https://termsandconditionstemplate.com/

Setting up the menu

You want people to be able to find their way around your website easily? Specially now that you have created your first few pages.

It’s time to create a menu and it is quite simple to do so.

1. Simply under appearances click Menu after which you will be redirected to a new page.

2. Here you will need to fill in the name of your menu. I would recommend a simple one such as Top, Main, Footer etc. 

3. Afterwards click “Create menu”.

Once you do so, you will get redirected to yet another page which allow you to add the pages you would like to appear in the menu.  


Creating a Menu - Travel Blog

1. Here you simply select the pages you would like to be displayed in the menu and click “Add to Menu”

2. Now select where you would like the menu to appear. Primary is usually the top menu and footer is the bottom menu.

3. Now all that is left is to click the “Save Menu” button and you have now successfully set your Menu for your WordPress Website.

Blog or Static Page

This is the part where you decide if you want to have a single front page for your website or if you want to showcase your newest most up-to-date journal entries of blog posts for people to keep up with your adventures.

1. To do this all you have to do is click on “Reading” under the Settings tab.

2. Now select whether you want a static page or your blog posts.

3. Once you decide which one you prefer simply selected and click save at the bottom of the page.

And now you can go to add a new page or add new post to create a new entry and have it display on the main page of your website.

Reading Setting WordPress - Travel Blog

Conclusion

It may seem as if there is so much to figure out to create your first blog but the hardest part is past you now.

You can literally get your message out to your followers so that they can see what you get up to.

Obviously there are other things that you can do to really optimize your website and make it unique but that is something you can focus on later down the track.

Luckily for you I am constantly updating this blog with more and more information which you can access in the future. What I would recommend, is to sign up to my newsletter to get notified when I have new video, new posts, and new tips to help you succeed online and become a nomad just like me.

If you find all this bit too overwhelming, I am more than happy to assist you with building your blog or creating your online identity.

Simply check out my plans below on how I can help you build the website you would fall in love with.

Additionally if you have found this post to be of help to you let me know in the comments section below and please share it with others so that they can also start their own travel blog or website as well

Summary of how to build a Travel Blog

Time needed: 1 hour and 30 minutes.

How to create a beautiful and simple Travel blog

  1. Pick a domain name

    The domain name is like the home address for your website. Find a simple, catchy and memorable name to use as a domain name.

  2. Sign up for a hosting

    Hosting is the plot of land that your domain name points to. It's where the website will be and where people will go to to visit your website. By selecting a hosting that best suits your needs you can make sure to provide your visitors with quick loading pages wherever you are in the world.

  3. Install WordPress

    WordPress is the internet's most used content management system (CMS) with over 30% off all pages powered by it. This means you have software which can run your websites very effectively, and has plenty of customization.

    This in turn means you can build a website that suits yours and your visitors needs, no matter what you can think off.

  4. Install a Theme

    By Installing a theme on your WordPress Site you are able to start designing the way you want your website to look for your visitors. Be it the colors, font etc. You have full control of that

  5. Create your Home Page

    With WordPress you have the option to create a static (Not changing page, like a home page) or a blog front page which displays your newest posts.

  6. Write your First Post

    This is an amazing moment as you get to share with everyone your first message. Make it catchy, make it interesting and entice people to come back for more.

  7. Your Journey to becoming a Travel Blogger has begun

    Now that you have set up your WordPress website and have created your first post, you are on your way to becoming famous travel blogger ready to share your adventures with your ever growing following base.

    This is an exciting moment for you 🙂 Check out our other pages to find out content creation best practices and also ways on how to get in front of the right crowd so that people start following you.

Resources

Domain Name Purchase – Namecheap.com

Hosting Purchase – Hostgator

Hire a Logo designer – Fivver.com

Create your own logo – https://logomakr.com/

Terms and Conditions Generator – https://termsandconditionstemplate.com/

Recommended Elementor Pro – Elementor 

More Interesting Articles

Comments

My SEO writing tool recommendations

Konrad W.

Been traveling the world for most of my life and love sharing my favourite Travel tips with everyone planning on doing the same.

My favorite online tools

Building Websites

For building websites I have been using Elementor. It's got a learning curve, but once you figure it out, it's simple and really quick to use for building amazing looking websites.

Writing Content

I love writing content and I love how AI has taken my work to the next level.

I don't necessarily want everything written by AI but I want a holding hand.

I use Frase.io to assist me with creating great copy

Wordpress SEO Plugin

For my SEO I use SquirrlySEO as it is simple to use, has suggestions on how to improve my sites search engine ranking and also keyword research all in one.

Works well with Elementor and overall is a powerhouse of a plugin.

Other Tools

To speed up my website and optimize the images I use Rabbitloader.

It speeds up the website significantly without having to do any of the tinkering that other programs require.

For my newsletter I use Mailpoet. I like being able to work straight from the Wordpress dashboard on all my projects and Mailpoet integrates directly into Wordpress.

Free Images

There are plenty of websites out there, but my favourite one for Free high quality images is Pexels.

Has plenty of High quality images and very simple to use. 

Subscribe to my newsletter

If you like the content on this website, please consider subscribing to my newsletter for more helpful tips and hacks

Recent Posts